
How to Rebuild a Brake Calliper
Today we look at how to rebuild a brake calliper. Are you having excessive brake dust on a particular wheel? or your wheel gets too hot for touch after driving? Or your car pulls to one side? You may have a sticky or seized brake calliper. This task is pretty much cross-cutting so this procedure transverses models and makes, some peculiarities may apply but the principles and approach is generally the same. Although, this procedure is done on a 2003-2007 Honda Accord 4cyl.
Why did I do this on my own car? 3 reasons;
- Torn dust boots: You’ll see them in a minute
- Swollen sliding pin dust boots
- Upper sliding pin for the left brake calliper had become sticky and moved poorly.
Sticky or seized brake callipers would rob you of MPGs so its best dealt with ASAP. Also, replacing torn dust boots will prevent sand and grit from getting into the protected chambers leading to more friction. This will cause sticking and seizing.
I would recommend that if you are having symptoms in one front brake calliper, rebuild the 2 front callipers at the least; that’s if you have rear drum brakes. My reason is that the supposedly working brake calliper(s) may not be far off from needing a rebuild too! Except if you just want to replace a torn boot.
Materials:
- Brake calliper rebuild kit: This will be model specific but should contain at the least, the exact parts you aim to replace. If you’re on a budget you can simply take your calliper to a used car parts (Tokunbo) market. You may be able to get the parts you need at a steal price.
I combined a Carlson calliper repair kit and Carlson calliper pin boot kit to get all the replacement parts I needed (Piston dust boots, square-cut seals, sliding pin boots and a few extras).
- Required wrench size for your sliding pin, calliper mounting, and brake line banjo bolts. For the 2003-2007 Accord these are 12mm, 17mm and 14mm respectively.
- Recommended Brake fluid: will be needed to bleed the brakes after the procedure.
- Flat tip screw driver
- Wire brushes
- Sanding paper
- Pliers
- Silicone grease (or as recommended by manufacturer grease. On this model Honda recommends silicone grease. Whatever the case, never use petroleum grease near brake parts, it will swell rubber parts!)
- Air compressor pump: If you don’t have this not to worry. I will show you my method for removing the piston from the calliper.
Steps:
1. Remove Tires, Jack up vehicle and support on stands: Jacks can fail, so always use support stands. Safety first.
2. Remove any bolts securing the brake lines to the knuckle
3. Slacken the 2 calliper sliding pin bolts & the brake line banjo bolts: Break the seal on the 3 bolts but leave them in place. The banjo bolt is the one on the raise cylinder between the 2 sliding pin bolts, pointing horizontally.
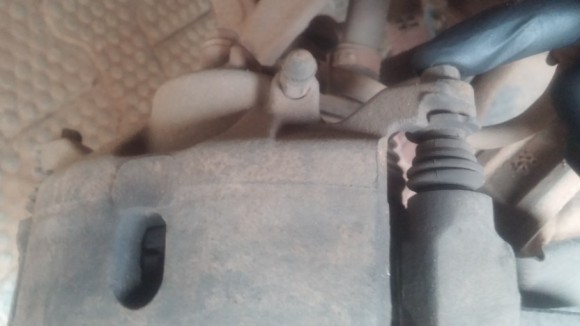
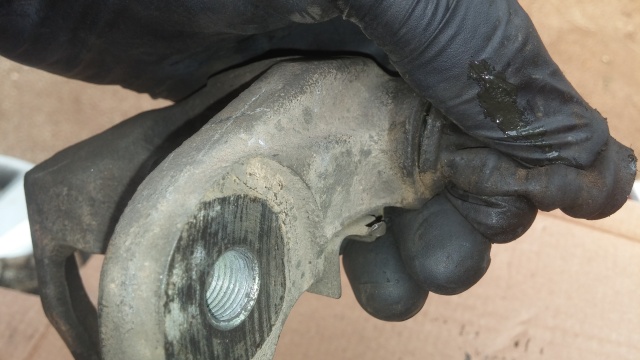
4. Remove the Calliper mounting bolts
Upper calliper mounting bolt illustrated
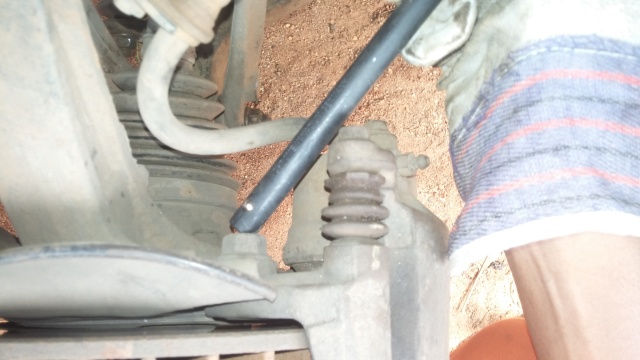
5. Partially remove the piston from the calliper: This is my method for doing this as I do not have an air compressor. Setup the brake callipers on both sides as shown below, ensure they are stable:
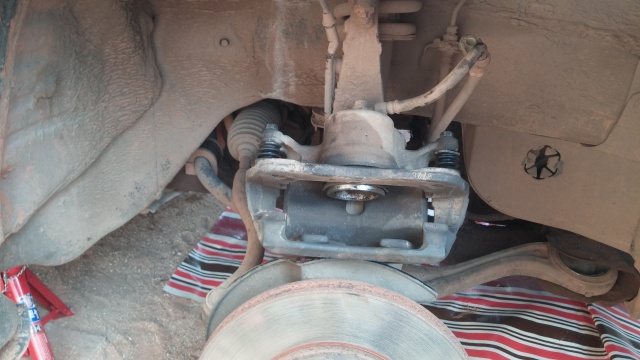
Setup for removing the calliper piston
Then pump the brakes a little at a time; 2 pumps, and check to see if you can wiggle the piston as it begins to comes out of its housing. Continue these steps until the piston begins to move by hand. When this point is reached, leave it in place then unscrew the brake line banjo bolt and secure the now open brake line to prevent brake fluid from bleeding out. There are many methods for this. Some will clip of the brake line or insert a suitably-sized rubber tubing into hole for the banjo bolt. I chose tie mine in a polythene bag with a rubber band.
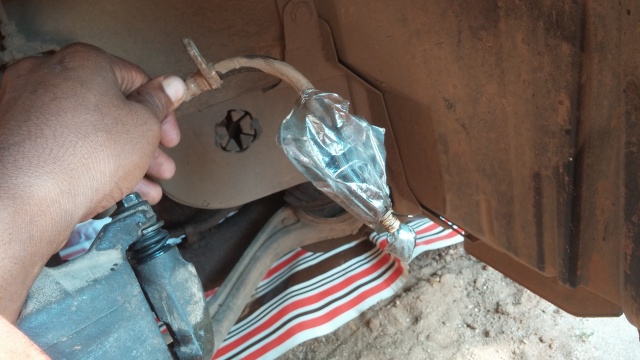
Brake fluid bleed out arrested with polythene secured by rubber bands
6. Separate the mounting bracket from the calliper: Removing the earlier slackened sliding pin bolts will achieve this.
Rebuild the Brake Calliper
This will be carried out in 2 parts: first we start with the calliper itself. It is a good idea to do this, one calliper at a time to prevent mixing parts.

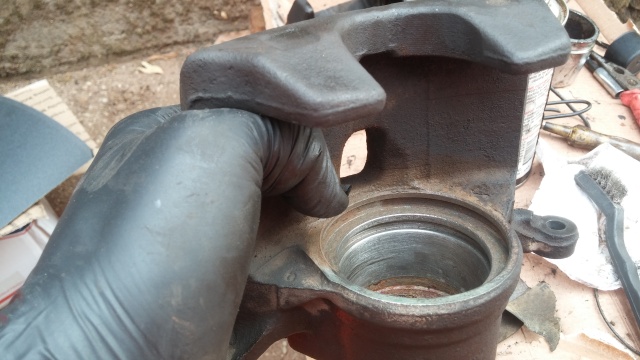
Brake calliper ready for rebuild
7. Remove the calliper piston: Since most of the piston had been pressed out in step 5, use a set of pliers to completely remove the piston. The really dirty piston was from my driver side which had a torn boot.
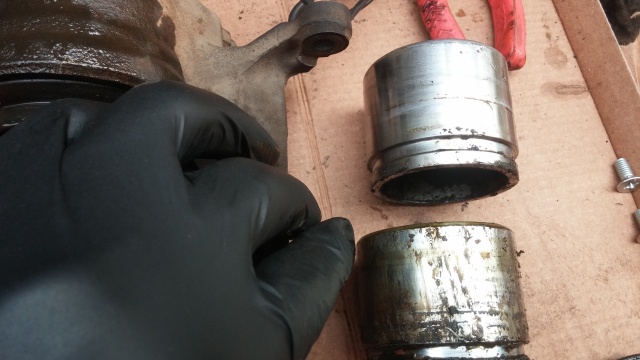
Calliper pistons removed
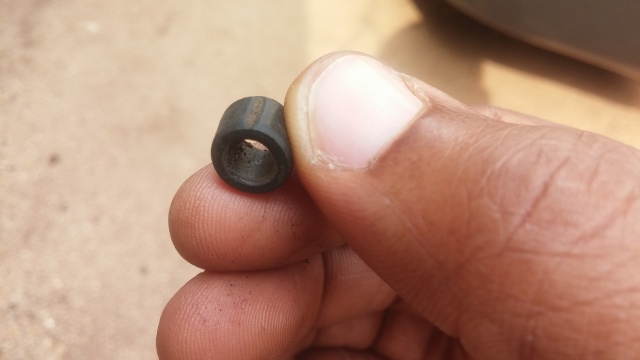
8. Remove the piston dust boot: Simply pull out the old boot by holding it at the base.
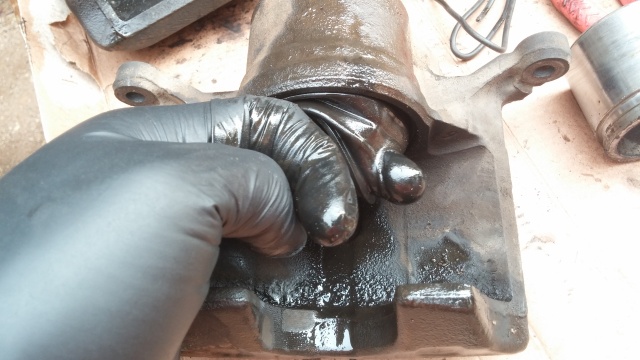
Hole in calliper dust boot demonstrated
9. Remove the piston dust boot retaining clip: Using a flat-tip screwdriver pry up the retaining clip left behind in the recess for the calliper piston boot. Once pried up simply remove.
Prying up the calliper dust boot retaining clip
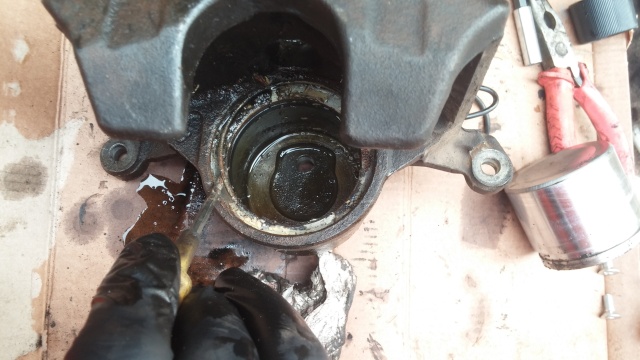
10. Remove the old square-cut seal: Using the screwdriver pry up, remove and discard the old seal.
Removing the square-cut seal
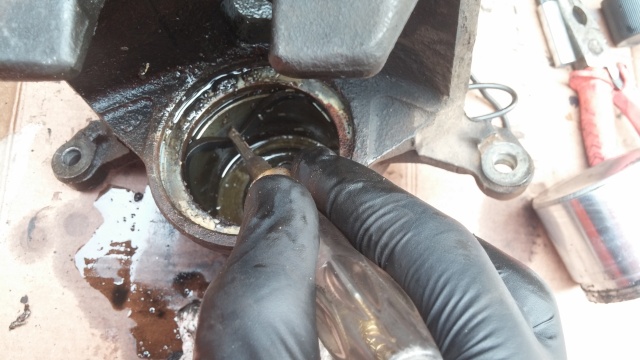
11. Clean out the brake calliper: You will notice all the crud in the piston housing, and the recesses for the square-cut seal and piston dust boot. Use brake cleaner (carb cleaner is an alternative since there are no rubber parts) to give the part a wash. Next use a wire brush and sandpaper to remove rust and any remaining dirt from the recesses and piston housing. Ensure the recess for the square-cut seal is properly cleaned if not, pushing in the piston will be difficult.
Calliper cleaner out, wire brushed and sanded where necessary
11. Follow reverse order to insert new rebuild parts:
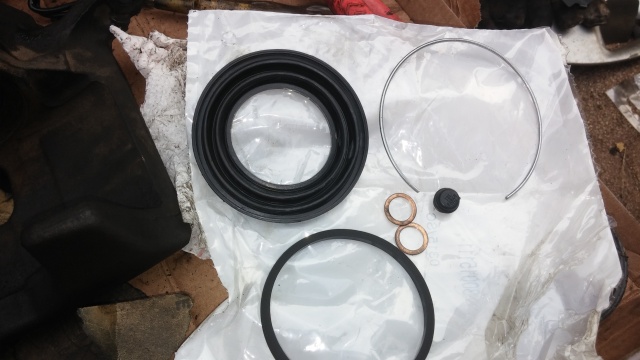
Brake calliper rebuild kit
First insert the new square-cut seal. The 2003-2007 Accord service manual recommends smearing this with silicone grease before inserting into its groove. Generally, red rubber grease is compatible with brake fluid but find out the recommendation from your manufacturer. If unsure, simply coat with brake fluid. Next insert the piston into its housing, but first wear the piston dust boot on the piston. The hole in the dust boot should fit in the groove at the neck of the piston. Then push in the piston till the base of the boot is in proximity to its recess. At this point, smear the end of the boot with silicone grease(or equivalent or brake fluid) and place the ends of the boot into its recess. Install the new piston dust boot retaining ring. Finally, completely push in the piston. If you’ve done a good job, the piston should go in by hand. If difficult, place a brake pad over the end of the piston and push in or tap in.
Rebuild the mounting bracket and sliding pins
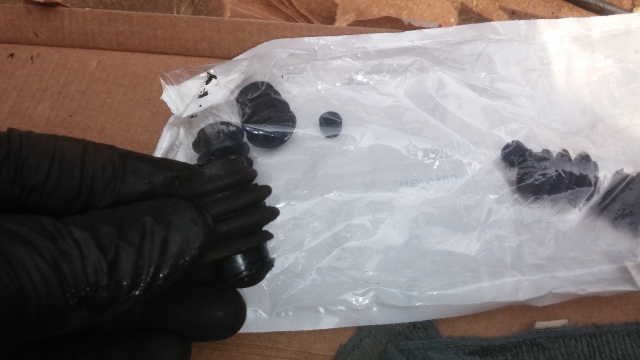
Sliding pin rebuild kit
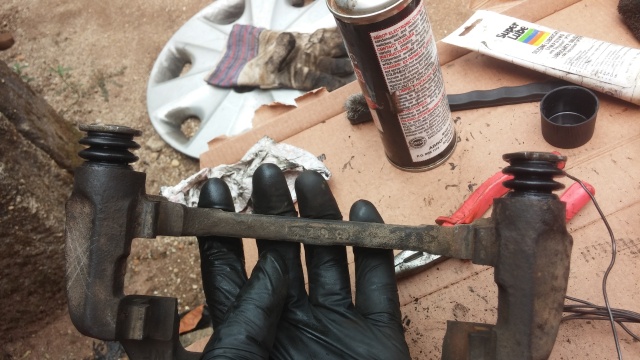
12. Remove the sliding pins and clean then up: Pull out of their recesses and wipe off old grease. Its good to wipe off old grease to prevent contaminating the new grease. If there are imperfections on the pins sand them off. Pay particular attention to any differences on the pins. On this Honda, the upper sliding pin is different as it has a boot. I also made a mark on the mounting bracket to keep a tab on the recess for the upper pin.
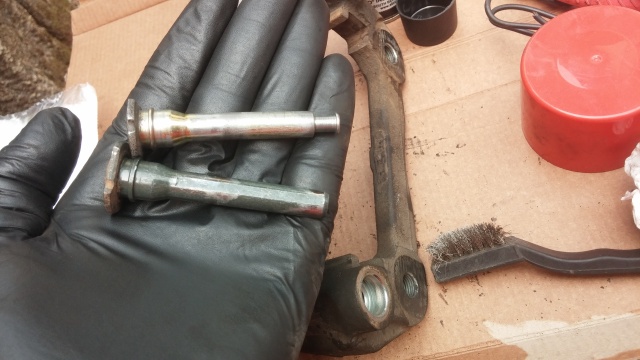
Calliper sliding pins
Upper sliding pin boot
13. Remove the sliding pin dust boots: They are not retained by anything, just pull out.
Removing the pin dust boots
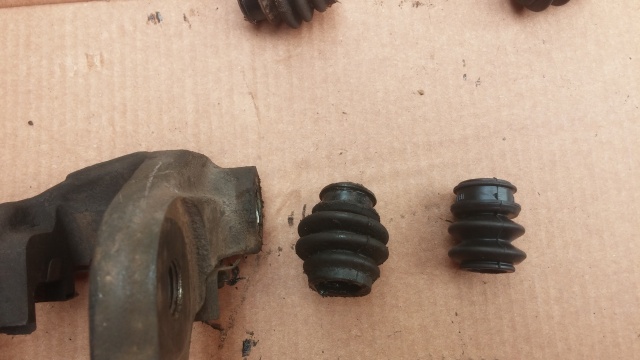
Old boots were swollen. I had used petroleum grease once. Never do that
14. Remove old grease from sliding pin recesses: I just wrapped a screwdriver with a paper towel, then inserted and cleaned the recesses.
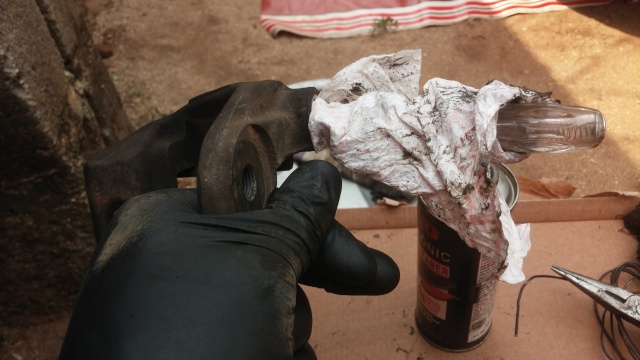
Cleaning the sliding pin recesses
15. Insert the new sliding pin dust boots: Smear the end of the boots with silicone grease(or recommended) and seat in its groove
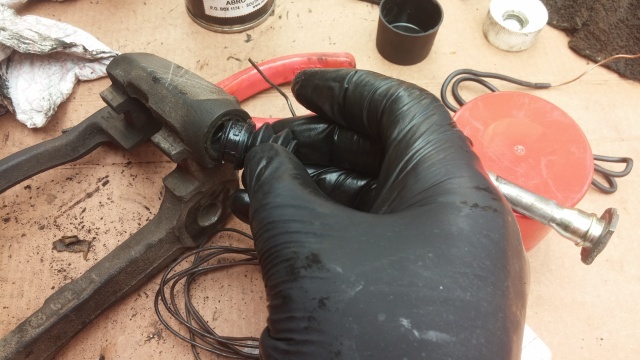
Inserting new sliding pin dust boots
16. Reinstall the calliper sliding pins: Apply silicone grease to both pins, replace the small pin boot for the upper pin shown in step 12 and reinstall into respective recesses.
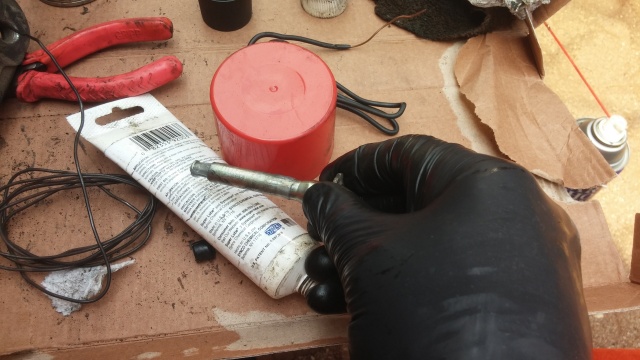
silicone grease applied to upper sliding pin
Looking good.
17. Follow reverse steps to remount parts: Torque for calliper mounting bracket bolts is 108Nm, and that for sliding pin bolts is 35Nm on the 2003-2007 Accord.
18. Bleed the brakes on the wheels you worked on
Your brake calliper rebuild is now complete!
Pingback: Rotors, Caliper Pins and Brake Pad Change 2003 - 2007 Accord - DIYAutoWorksNG